WordPress is one of the few reliable Webhosting platforms in the market today. Whether you are a newbie or a seasoned website owner, it is relatively easy to customise and use the platform. But first, let’s learn the basics of WordPress hosting.
Table of Contents
What is WordPress?
WordPress is an open-source Content Management System, or CMS, that allows you to host and build your websites. The platform is written in PHP and paired with the MariaDB database or MySQL. WordPress allows you to maintain and customize your website, even without any coding knowledge.
Initially, WordPress was a simple platform designed for small tasks such as hosting blogs on the internet. However, improvements over the years have turned the platform into a powerful tool that handles almost any type of website.
WordPress hosting is essentially a finished Webhosting product designed and pre-configured to efficiently host a WordPress-powered website. But, what are the benefits of using a WordPress Webhosting plan?
Benefits of WordPress Webhosting
If you are using a WordPress website, WordPress hosting is arguably the ideal hosting plan to pick. WordPress Webhosting platforms are pre-configured to be highly compatible with WordPress websites. Therefore, you not only enjoy superior performances but also get a wide range of excellent WordPress management features.
Even though different hosting service providers offer varying features, these WordPress Webhosting benefits are standard with all of its providers.
1. Cloud-Based Hosting
One of the most appealing benefits of using WordPress hosting plans is the fact that they are cloud-based. As a result, the benefits of Cloud Hosting, such as instant scalability and reliability, are passed on to WordPress hosting. That means you do not have to worry about website failures when using a WordPress Webhosting plan.
2. Great Performance
Website performance is one of the significant things to consider when it comes to Webhosting. A slow web can be a considerable disadvantage, especially if it is a business website. Luckily, you no longer have to worry about performance with a reliable WordPress Webhosting plan.
When using WordPress Webhosting, each software has its specific set of system requirements, which determines how well it will perform. What this does is ensure the hardware, firmware and software configurations are all compatible so that the website runs smoothly.
Learn more tips to enhance your website’s performance here.
3. Managed Services
Another benefit of using WordPress Webhosting is managed services. But, what do managed services mean?
Managed services in WordPress Webhosting imply that the WP staff will handle most of your website maintenance needs. We all know how costly and time-consuming website maintenance can be, especially for a newbie. The WordPress hosting team would ensure your website gets the resources required to run efficiently without you having to deal with the specifics.
But, that doesn’t mean you do not have power over our website maintenance. You can make changes to your website whenever you desire. However, you must ensure you use the WordPress maintenance mode to inform the web visitors that you are making significant changes that could make it difficult or dangerous to use the site.
How to Get Started with WordPress Hosting
Now that you know the advantages of using WordPress hosting let’s check out some basics on getting started with WordPress Hosting. Whether you already have a website or creating from scratch, the process isn’t hard. Here is a step-by-step guide for the whole process.
Step 1: Get a Hosting Plan
A website requires a web server, where you will store your website’s data and files. The web server is also responsible for transmitting information across the web to the web visitors visiting your website. To get a web server, you need to sign up for a Webhosting plan.
You can pick a WordPress Webhosting plan from a wide pool, depending on your requirements and the type of website you want to create. You can also consider shared Webhosting plans if you are a little tight on finances.
Step 2: Check out the Control Panel

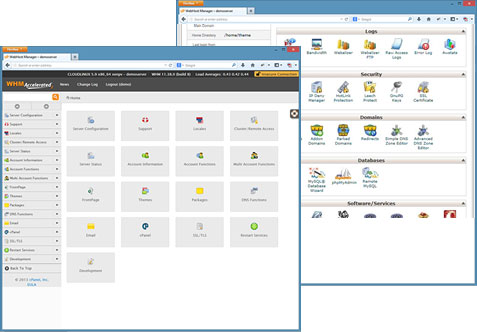
The next step is to explore and familiarise yourself with your control panel. The control panel is where you will access all the tools you require to effectively manage your website. In this second step, you need to ensure you complete the following administrative tasks:
- Register a domain
- Ensure WordPress is installed
Step 3: Register Domain

In this step, you need to choose a unique and simple domain for your visitors to easily remember. A domain refers to a web address where you will host your site.
Step 4: Customise Your Website

This is the final step of website hosting with WordPress. Here, you can now start building your dream website. Features such as the WordPress Website wizard and WordPress keyboard shortcuts would make this step relatively easy by guiding you through the entire process. That includes picking the theme, filling in social media profiles, among many others.
How to Increase WordPress Memory Limit
If you are getting a WordPress memory limit error, it means you have hit a PHP memory limit on your website. There are two primary methods you can use to increase WordPress memory:
- Upgrade your website’s hosting plan
- Increase the PHP memory allocated to your website
- Upgrade Your Website’s Hosting Plan
Each option of Webhosting plan offers a specific amount of resources. At first, these resources might be enough – however, they might be insufficient after a while. The first step to take is to check out how much memory your current hosting plan permits. You can find such info on your hosting dashboard or the provider’s website.
In this first option, you increase your WordPress memory by choosing a different plan or upgrading to a higher tier.
Increase WordPress memory Allocated to our Website
Another simple solution to fix the WordPress memory limit error is to increase how much memory the site can access. However, you need to understand that the increase limit would depend on your hosting provider and the plan they offer. Additionally, it is very uncommon for your website to use a smaller memory than is allocated.
Here is how to increase your PHP memory limit
Edit the wp-config.php file and enter ‘define(‘WP_MEMORY_LIMIT’, ‘512’) to increase memory for the front end.
Alternatively, you can edit the PHP.ini to show 256M or 512M if it shows 64M. However, this only works if you have access to your PHP.ini file.
If you do not have access to your PHP.ini file, then you should consider adding ‘php_value memory_limit 512M or 256M’ to an .htaccess file.
Wrap up
Increasing your PHP memory limit might not be as easy as it seems. However, things would be a little easier with the guide above. If none of the options work, then you should consider contacting your WordPress Webhosting provider.
